AI rig from scratch I
AI rig from scratch I
I’ve recently started my journey into the world of Artificial Intelligence, and it didn’t take long for my curiosity to shift towards the hardware. I wanted to understand how to set up and run powerful models locally. My current laptop, a trusty but aging machine, was definitely not up to the task. This led me to investigate how I could get my hands on capable hardware at a reasonable price.
Defining the requirements
When you’re new to a field, defining your exact needs can be challenging. I decided to start with a solid, minimum-viable setup that I could upgrade later if needed (after all, renting GPU time in the cloud is always an option).
My research indicated that 16GB of VRAM was a great starting point, capable of running and even training a wide variety of models. This became my core requirement.
I also knew that building a desktop computer from individual parts is generally cheaper than buying a pre-assembled one with the same specs. Plus, the idea of building it myself was a challenge that really appealed to me.
And so, the decision was made: I was going to plan and build my very own AI rig.
I was heavily inspired by this fantastic video from Sourish Kundu, which shows the end-to-end process of building a machine learning server. It was exactly what I wanted to do, though I aimed to be a bit more budget-conscious.
The shopping list
I’m not a hardware expert, so I focused my search on NVIDIA GPUs to ensure compatibility with CUDA. I landed on the Asus Dual RTX 5060 Ti 16GB. As a recent-generation GPU, it offered the best of both worlds: a more affordable price point but with the crucial 16GB of VRAM I was looking for. It seemed like the perfect foundation for all the main AI tasks I had in mind.
With the GPU selected, I turned to ChatGPT and Gemini for help picking the other components. My goal was to balance price and performance, and I found that second-generation parts often hit that sweet spot.
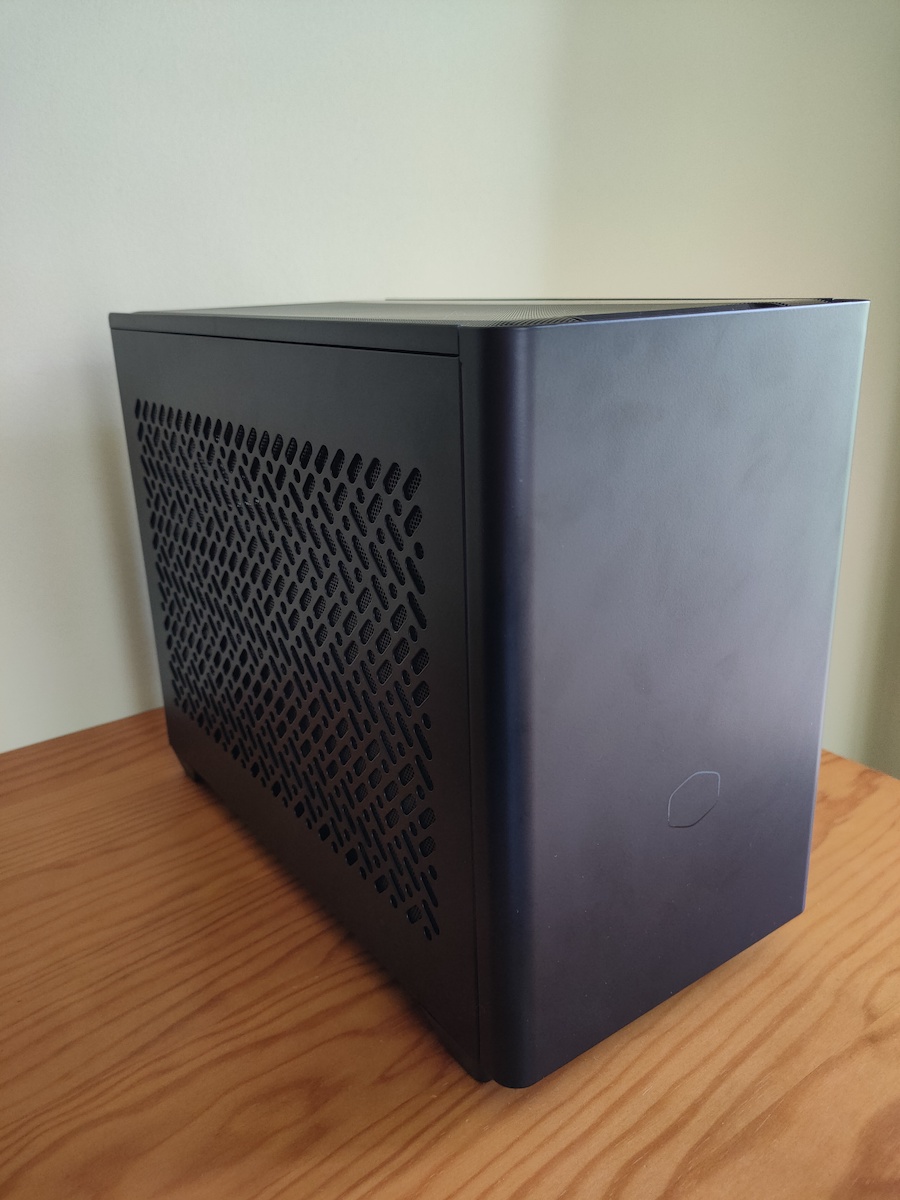
The case was another critical decision. I love compact, small-form-factor (SFF) builds, so my choice of the Cooler Master NR200P V2 influenced the rest of the parts, requiring an ITX motherboard and an All-In-One (AIO) liquid cooler.
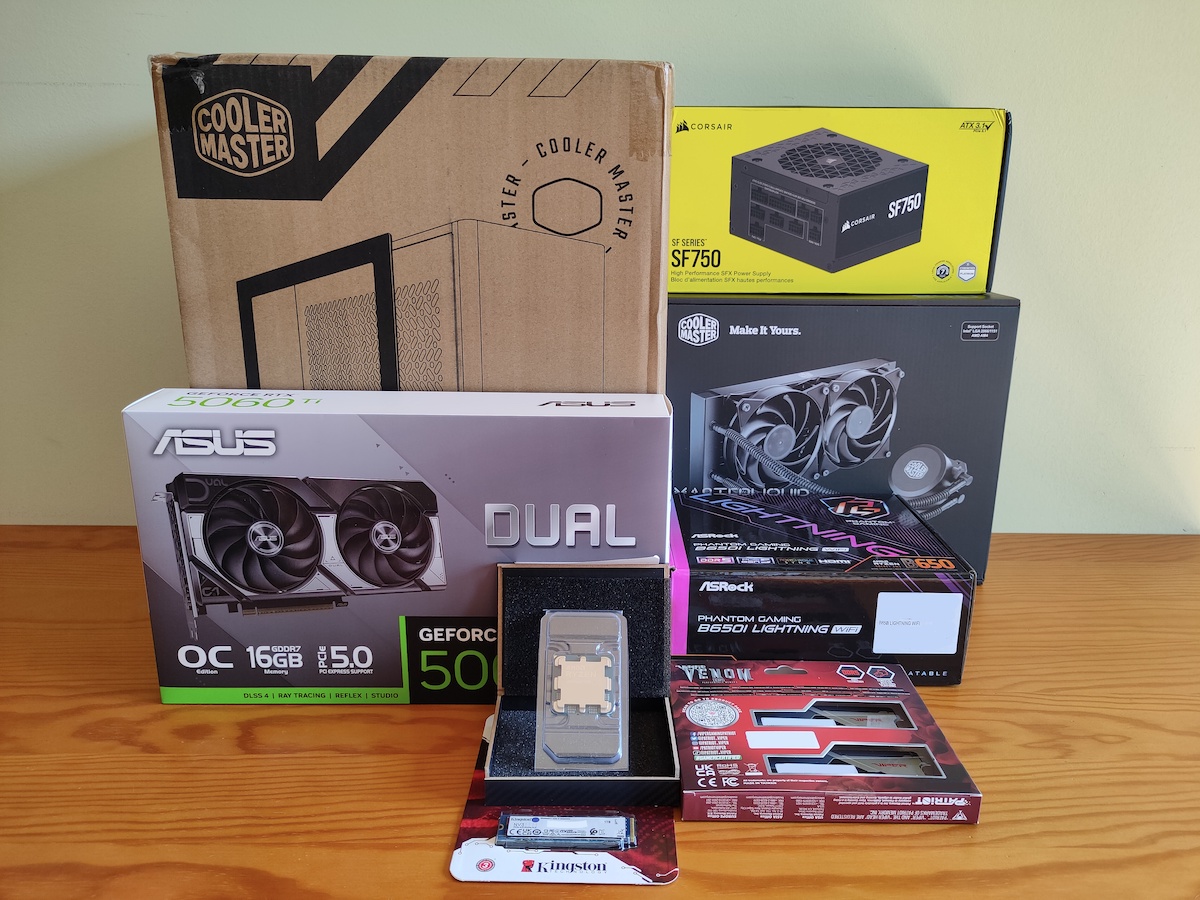
After a couple of weeks of hunting for deals on Spanish online stores, this was my final component list:
| Component | Model | Price (EUR) |
|---|---|---|
| GPU | Nvidia Asus Dual RTX 5060 Ti 16GB | 420 |
| CPU | AMD Ryzen 7 7700 | 164 |
| PSU | Corsair SF750 80 PLUS Platinum | 155 |
| Motherboard | ASRock B650I Lightning WiFi | 167 |
| Case | Cooler Master NR200P V2 | 120 |
| RAM | Patriot Viper Venom DDR5 (2x16GB) 6000MT/s | 93 |
| SSD | Kingston NV3 1TB | 57 |
| CPU Cooler | Cooler Master MasterLiquid 240 Lite | 58 |
| Fan | Arctic P12 Slim | 10 |
| TOTAL | 1244 |
One week later, all the parts had arrived. The party was about to begin!
The assembly process
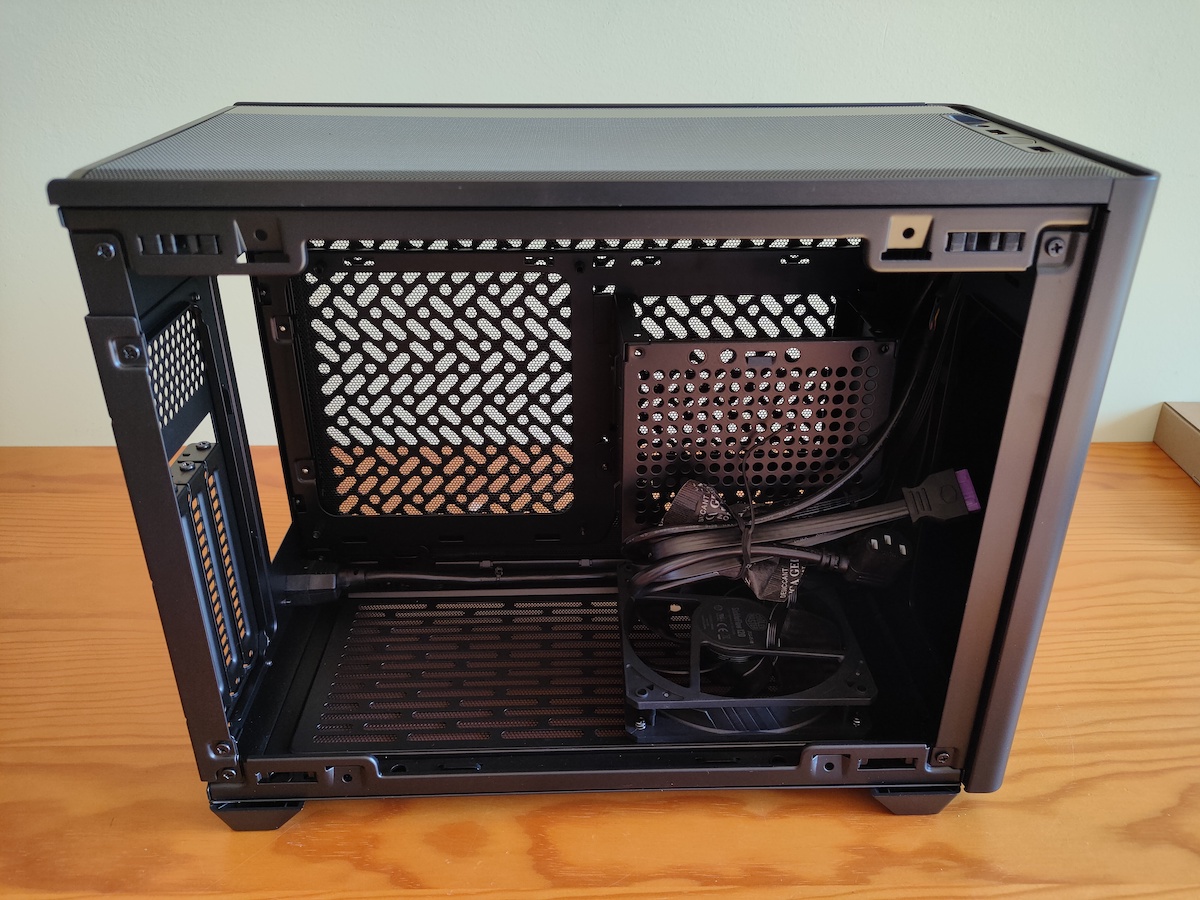
Step 1: Prepping the case
The first thing I did was unbox the Cooler Master case and disassemble it. I had read many good reviews, but I was still thoroughly impressed with the quality of its materials and thoughtful design.
Step 2: The motherboard assembly
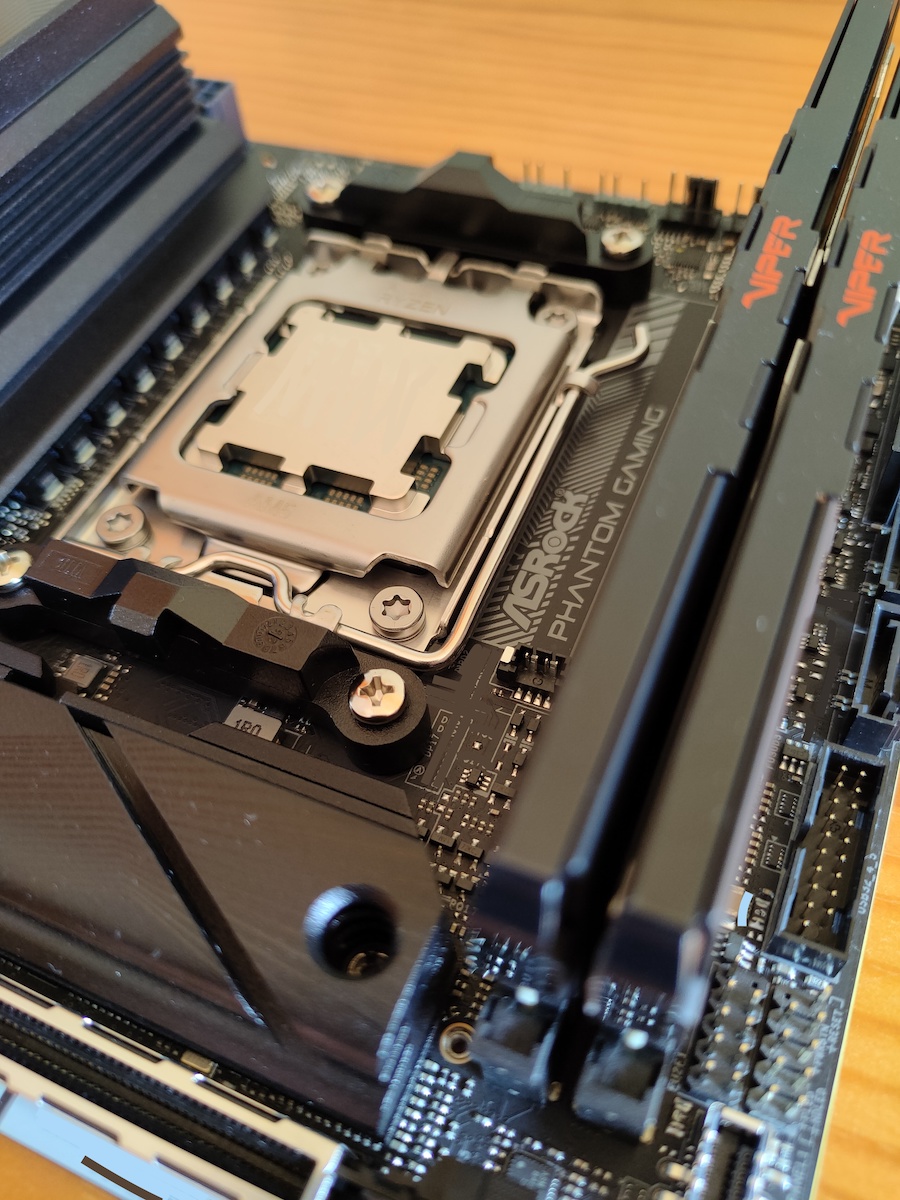
With the case ready, it was time to build the heart of the machine. I started by installing the AMD Ryzen 7 7700 CPU, the Patriot Viper Venom 32GB DDR5 RAM, and the Kingston 1TB NVMe SSD onto the ASRock B650I Lightning WiFi motherboard.
The motherboard even included a heatsink for the primary NVMe drive. Here’s how it looked all together:
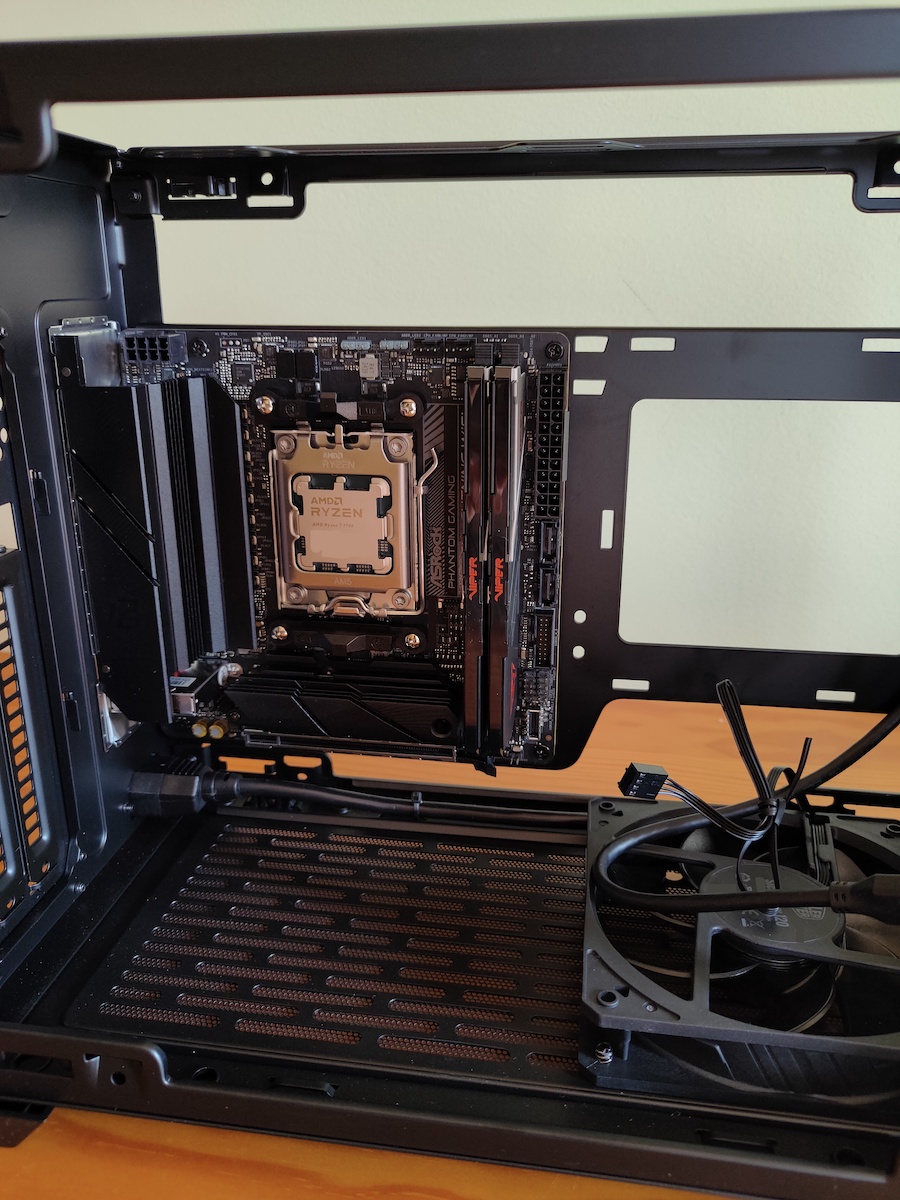
After securing it in the case with just four screws, I connected the front panel cables: the power button, USB-A, USB-C, the audio jack, and the pre-installed bottom fan.
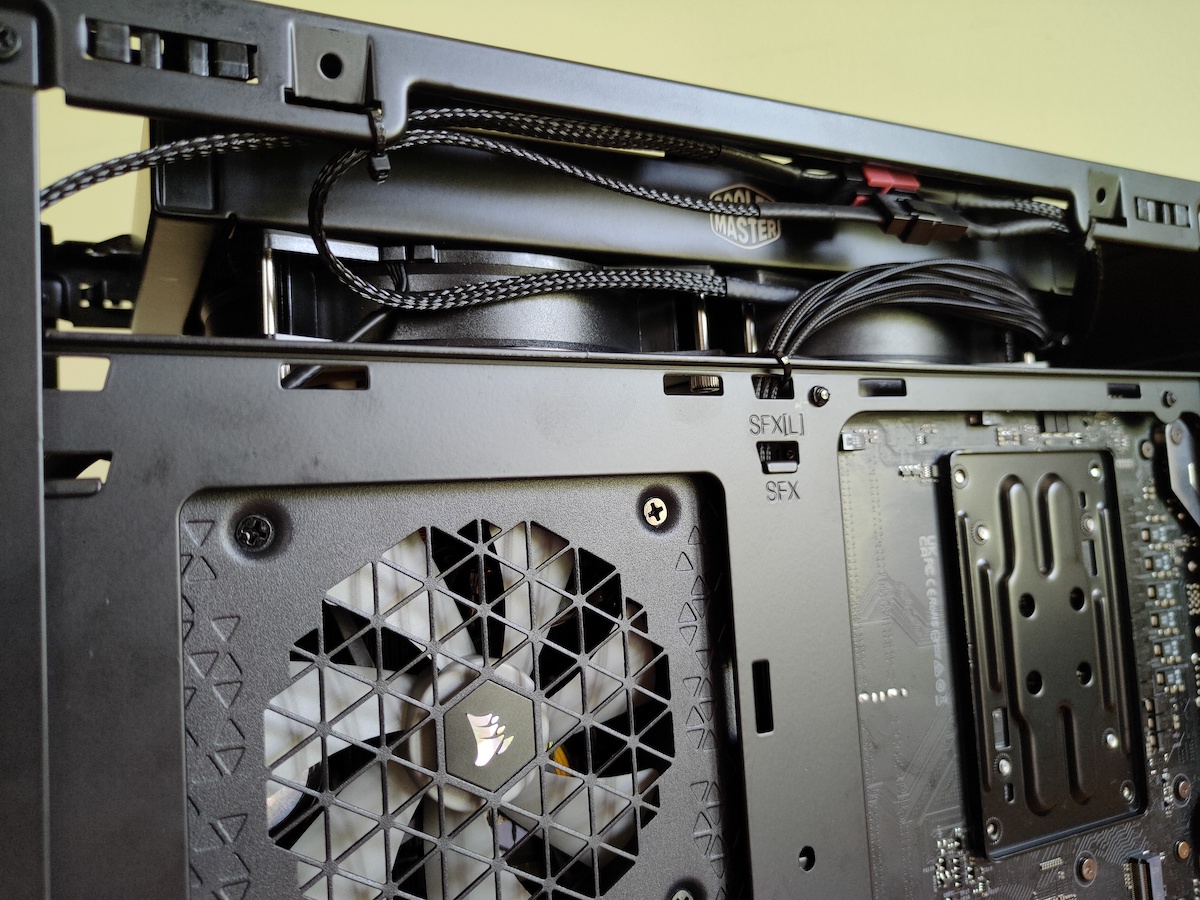
Step 3: Powering it up with the PSU
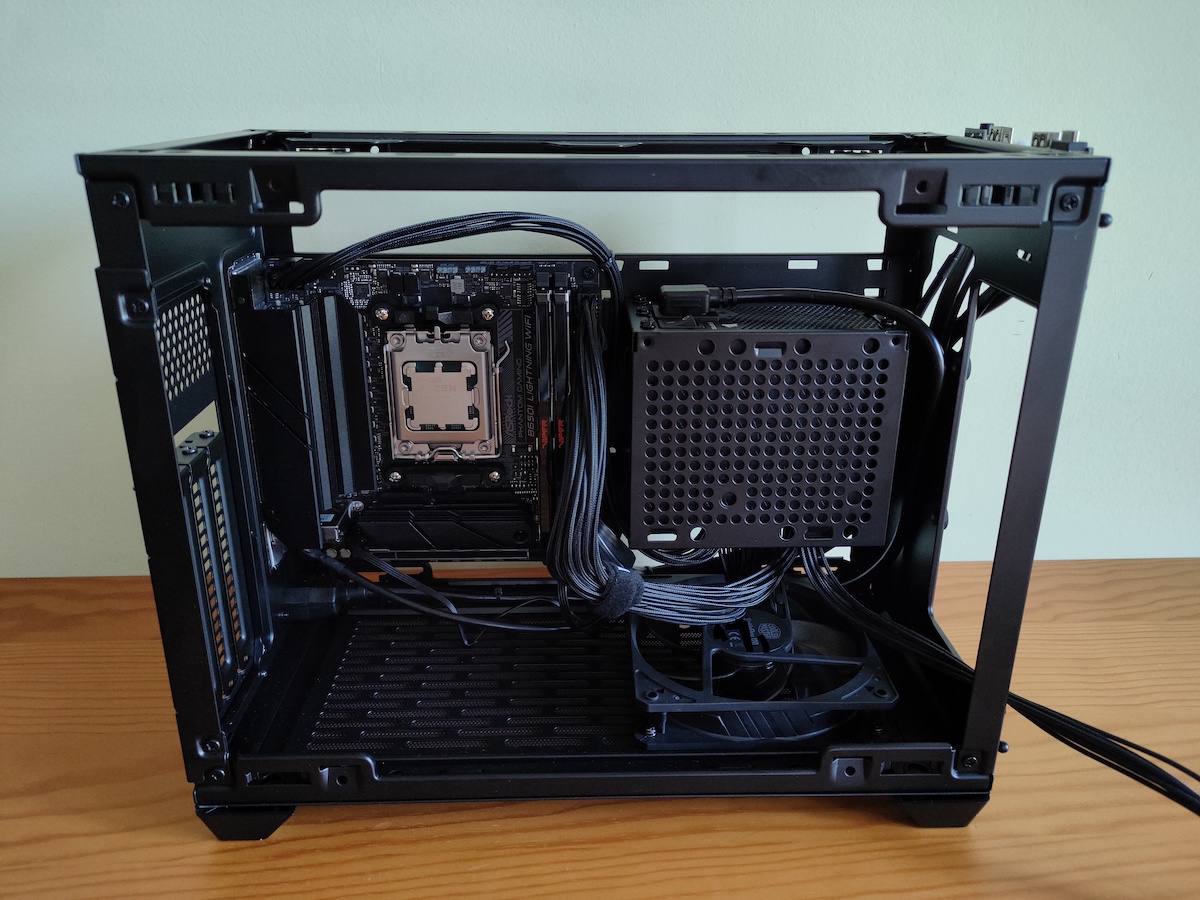
I selected the Corsair SF750 for its compact SFX format, excellent reviews, and Platinum efficiency rating. Being fully modular was also a huge plus for cable management in a small case. I attached the essential cables (CPU, motherboard, and PCIe for the GPU) before mounting it.
A lesson learned: CPU and GPU power cables are not interchangeable! Fortunately, I figured this out before damaging anything. After connecting the power to the motherboard and CPU, I did my best to route the cables neatly to avoid a mess later on.
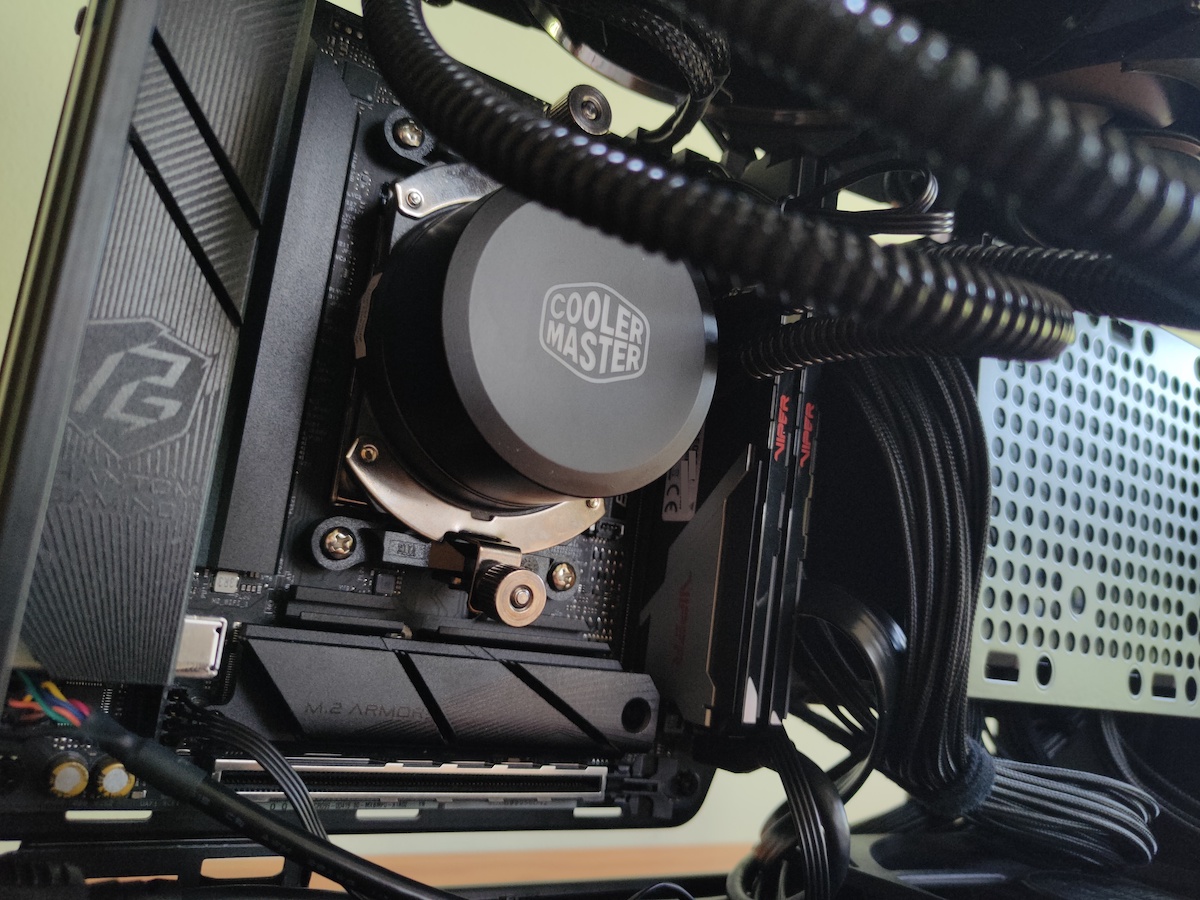
Step 4: Keeping it cool
Given the compact case, a liquid cooler was the most practical choice. I first mounted the fans onto the radiator and attached the AM5 bracket to the pump. The build quality of the cooler felt great for the price, but the plastic tubes were quite rigid. This forced me to mount the radiator in a slightly unconventional position. It wasn’t a problem, just something to work around.
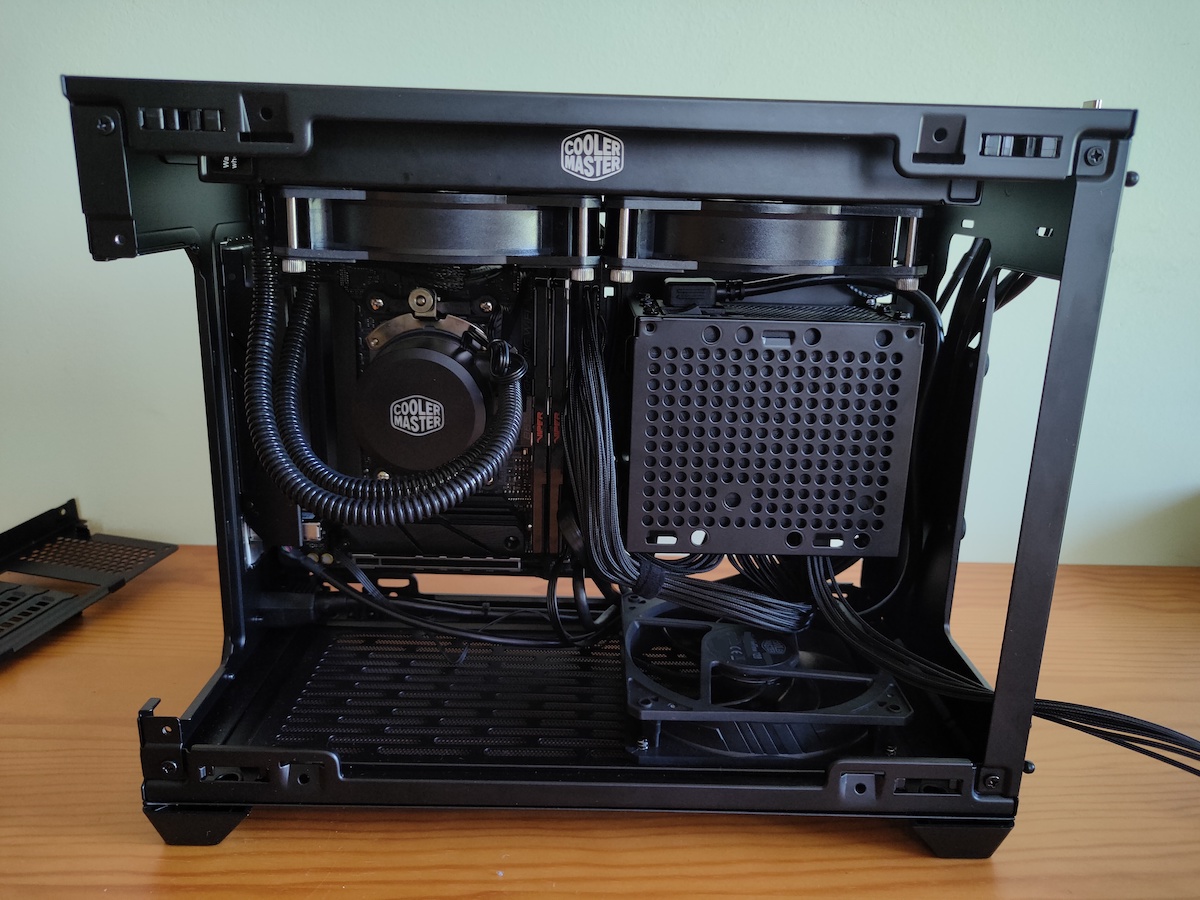
With a bean-sized drop of thermal paste on the CPU, I screwed the radiator to the top of the case and secured the pump over the CPU. Finally, I connected the pump and fan cables to the motherboard headers, making sure to keep the cables tidy.
Step 5: The star of the show
And now, for the queen of the kingdom! The Asus Dual RTX 5060 Ti 16GB was my key to unlocking the world of AI.
Mounting the GPU was straightforward. I removed the necessary PCIe slot covers from the case, slid the GPU into place, and screwed it in securely. Then, I connected the PSU power cable and the short PCI riser cable (conveniently included with the case!) to the motherboard.
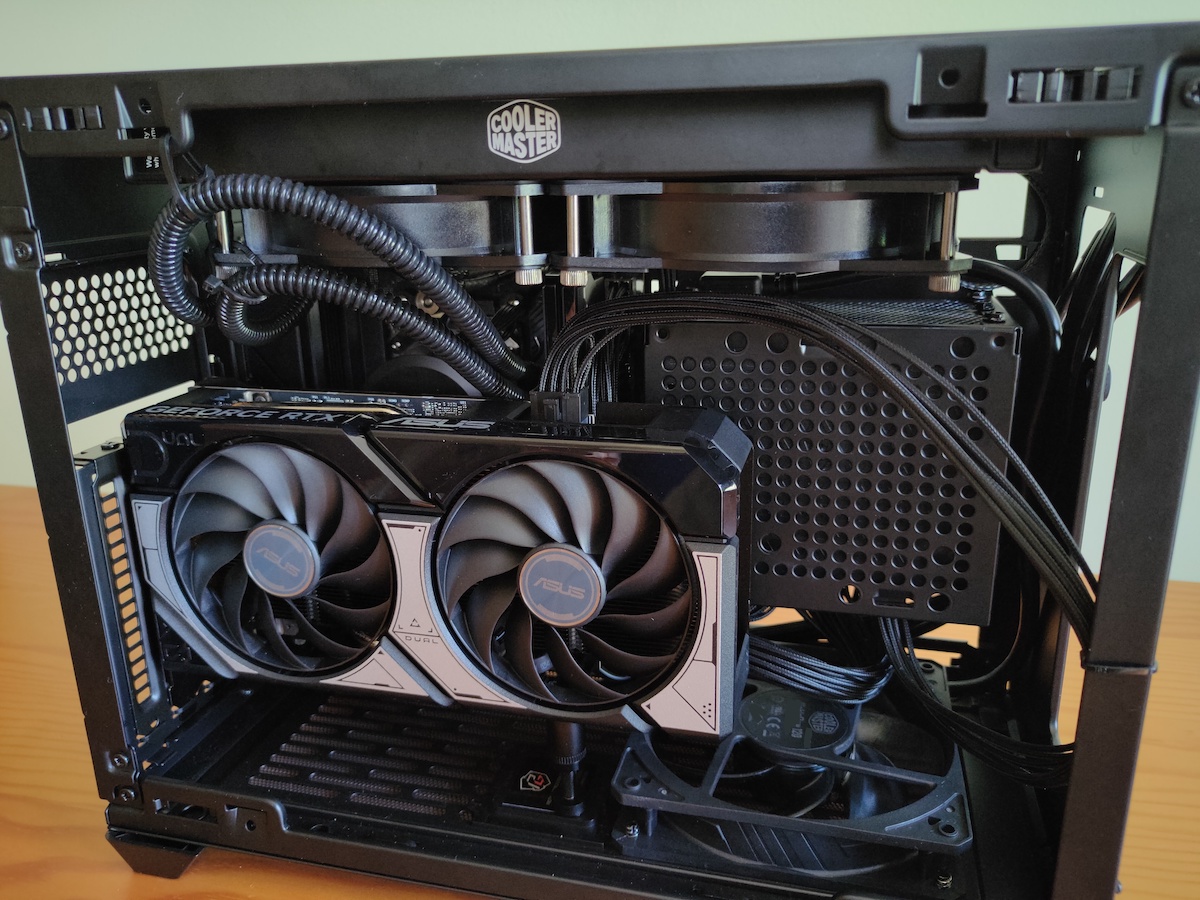
After some final cable management, it was done!
Tadaaaaa!
All that was left was to connect the main power supply, attach the WiFi antennas, and plug in a temporary screen and keyboard to start software installation.
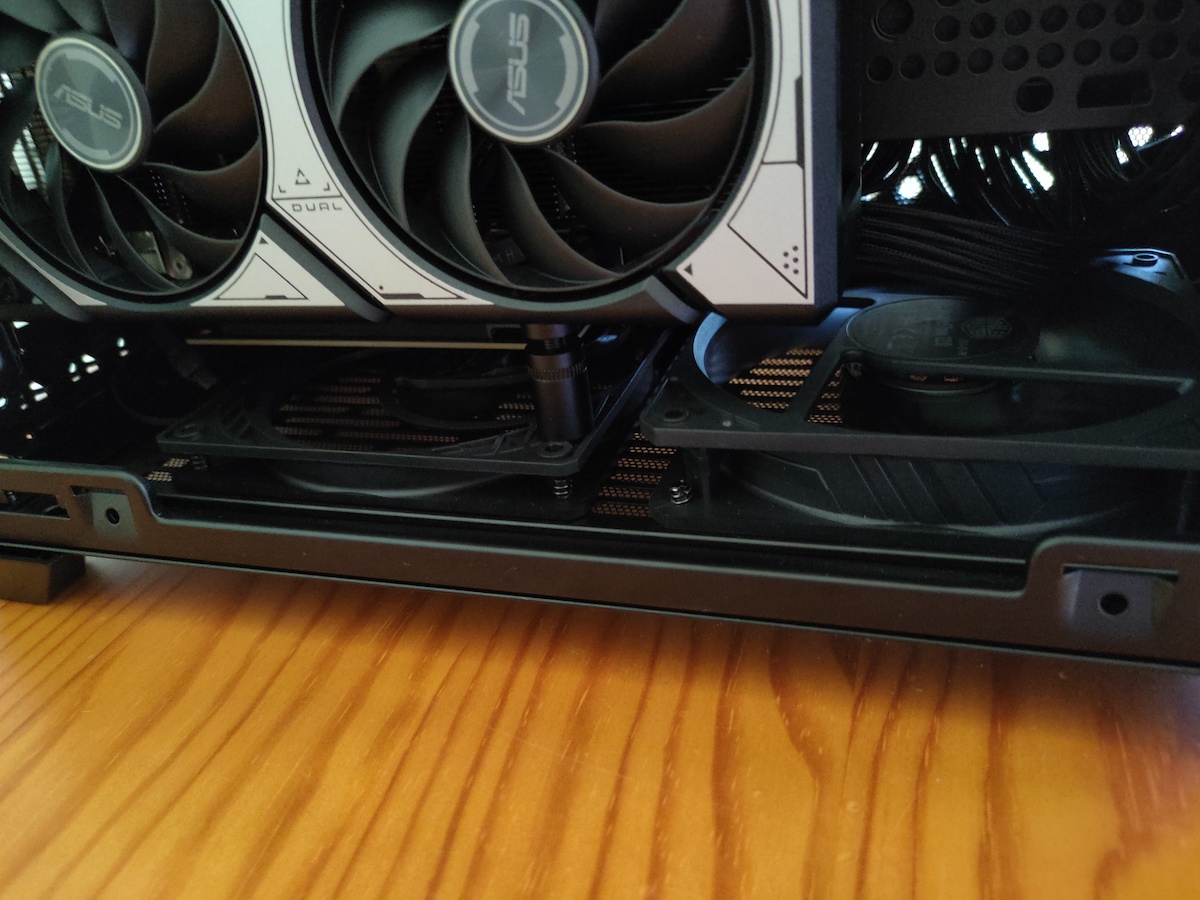
Bonus: An extra fan for peace of mind
After installing the OS and running some thermal tests I noticed that one of the SSD sensors was reporting high temperatures. To improve airflow, I decided to add another slim fan to the bottom of the case.
The magnetic dust filter on the bottom made this incredibly easy. The Arctic P12 Slim fan even came with a Y-splitter cable, making the connection straightforward. I did have to briefly remove the GPU to access the fan header, but it was no big deal.